Posts

For the Beginning Stamper/Card Maker

Image
  What I need to start creating my own hand made cards?  So that is a question I get asked a lot! ~ I think it's time to address that very question.  If you have been wondering this very thing, then this post is for you!  Grab a coffee or tea, keep reading and I'll walk you through the basics, and hopefully that will be of some help.   There are a few basic essentials you will need to start handcrafting your own greeting cards, and we will talk about those later in this post, however I think first we need to focus on exactly that ~ the focal point of the card that you intend to create.  Get yourself a scrap of paper, ( I know it sounds like school already and you have to take notes ) and answer a few questions.  1. What type of card do you want to create? Are you creating for a specific season like Christmas or you want to be able to make some all occasion cards such as birthday, sympathy, or just generally friendly note cards.  If you want t...

Joy Fold Card Tutorial

Image
Accordian Style Joy Fold Fun Fold Card Tutorial ~  Isn't this card just beautiful?!  With the Christmas season just about upon us, quick and easy yet beautiful cards are a must.  This card really is just that quick, easy & beautiful.  So the measurements are below, Give it a go!  All images © Stampin’ Up!® Measurements: • Evening Evergreen: 4 ¼” x 11” scored at 5 ½“ and 2 ¾” folded as shown below • Evening Evergreen square scrap (for wreath die cut) • Soft Succulent square scrap (for wreath die cut) • Basic White: 4” x 5 ¼”  ( inside panel ) • Basic White: 3 ½ x 2 ½  ( attaches to Cherry Cobbler layer ) • Basic White: 2 ½” x 4”  ( mat for DSP card front layer ) • Basic White: a strip ½” x 3½”  ( for Stamping Sentiment ) • Cherry Cobbler: 3 ¾ x 2 ¾ “  ( focal point layer ) • Designer Series Paper: 3 ¾ ” x 2 ¼”  ( DSP layer for card front ) • Designer Series Paper: 3 ¾” x 2 ¾ “ ( DSP for inside panel )   All images © Stampin’...

Beautiful Lantern Video Clip

Oh this gorgeous lantern!!  Check out this gorgeous paper lantern decoration for your Christmas Tree!  It's just "oh so cute" Thanks for having a peek! 😏 As Always, The Paper Artist  

Christmas Memories of Cards Gone By...

Christmas Memories~ Just a little video clip of some adorable Christmas creations from last year! Some of these may get recreated this year! Using different stamps and Designer Series Papers of course!  Thanks for having a peek! 😏 As Always, The Paper Artist  

Basic Card Tutorial ~ Peaceful Deer

Image
  Basic Card Tutorial 2 ~  Last post we covered a basic format for a quick 5 minute card! Pictured below is one of the versions created in the tutorial.  Awesome design. I hope you tried it. If you missed it you can click here to go back and give it a try.  So, in this post I want to show you that using the same basic card measurements, you can create a different card layout just by changing or cutting the same pieces used in the first card layout. Here we go!!  Card base: 8 1/2 x 5 1/2, Scored at 4 1/4  Cut 2 1/8 inch off of the front side of the card base.  Cut your DSP layer at 4 x 5 1/4 Then cut that layer in the middle at 2 inches. You now have 2 pieces of 2 x 5 1/4 Dsp layers. White cardstock: 4 x 5 1/4  Attach one piece of the DSP to the right edge of the white cardstock layer ( card inside ) as pictured. Leaving the other half exposed for writing on the greeting card. Adhere the inside panel to the inside of the card. Attach the 2nd piece...

The 5 Minute DIY Card Tutorial

Image
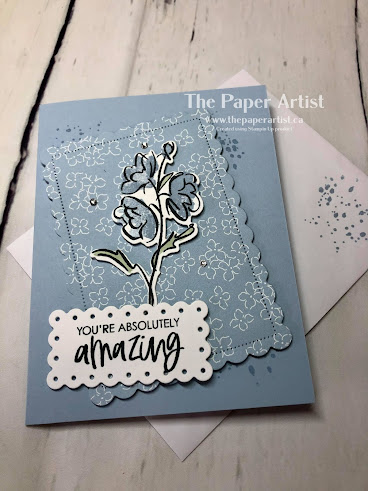
Make a DIY Card in Less Than 5 minutes ~ Every stamper should have a "go to" card, one that is so easy to make you can whip it up on a moments notice! Does that ever happen to you? You're almost ready to go out the door and then "oh dang, I need a card".  This is the card that will enable you to just throw one together and still be on time!  Here is a quick tutorial for the card:  Cardstock: 8 1/2 x 5 1/2 Scored @ 4 1/4  DSP: 4 1/2 x 3 1/4  (or rectangle die cut.  I used a rectangle from Color & Contour dies ) 1 Focal Point, stamped, cut & colored ( I chose a flower from Color & Contour stamp set ) White Scrap: to stamp sentiment ( or die cut sentiment such as the one I used )  White Cardstock: 4 x 5 1/4 ( inside panel ) Dimensionals or glue Bling! I used a texture stamp ( splotches ) to add a little color to the inside panel and then attached the inside panel to the inside of the card, as pictured below.  Attach the DSP to the front o...

Cube Card Technique

Image
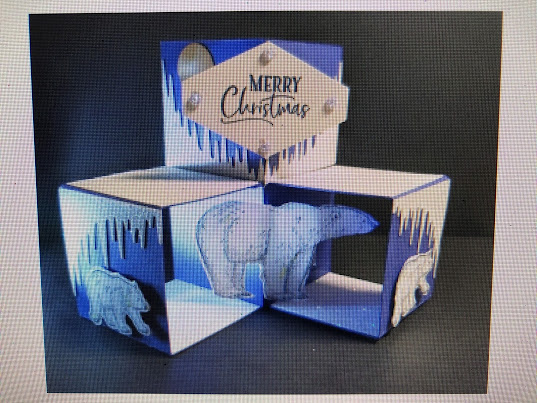
  Cube Card Technique ~ Very Fun Fold I definitely need a better picture of this adorable card, and I will post one as soon as I take a better picture.  Below are the instructions for this fun cube card technique!  Let me know if you try it!  1. Cut a piece of thick cardstock to 8" x 8 1/4". 2. Place the 8 1/4" at the top of score board and score at 2", 4", 6", and 8". 3. Now turn your cardstock so that the 8" side is at the top and cut at 2" and move it over and at 2" again. You should now have 2 pieces that are 2" x 8 1/4" and 1 piece that is 4" x 8 1/4".  4. You can now add DSP to the areas you want. The cube sides would be 1 15/16" x 1 15/16" (that is the little mark on your ruler, just before the 2" mark ). The larger piece of DSP would be 1 15/16" x 3 15/16". (You can also add your DSP after the cube card is put together. Whatever works best for you). 5. You can see in my pict...